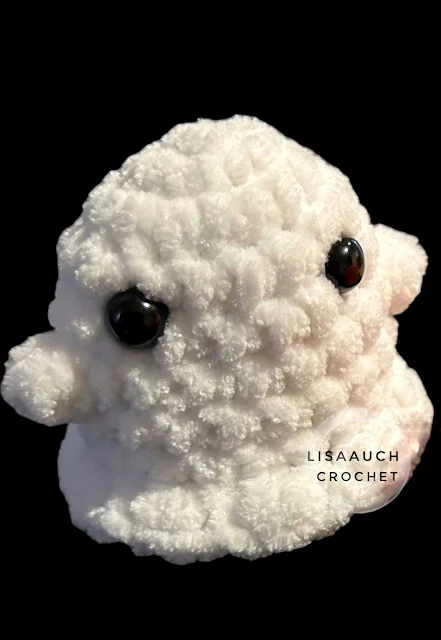
This cute spooky Halloween crochet decoration idea for your car.
The Small Ghost is NO SEW and is crocheted all in one, and the Pumpkin is super simple to crochet as it starts with a small rectangle piece, and just cleverly sewn together.
This is an original FREE crochet Pattern to make the Small Crochet Ghost and Small Crochet Pumpkin hang from your rear-view mirror or to use as Halloween Decorations.
You can now BUY an AD FREE Printable from Ravelry with Direct Download sent to your email (Secure Checkout with Paypal)
Buy PDF Now or Add to Your Ravelry Cart HERE
I Love Halloween and I love crocheting Halloween decorations. This year my husband had asked me to crochet some car small crochet projects to hang from his rearview mirror changing them up for the seasons throughout the year.
The small Sunflower hanging basket was the first mirror charm I made for his van in the summer.
FREE sunflower Hanging Car Decoration Pattern HERE
So with Halloween season, I decided to make a Small Crochet Ghost and a Small Crochet Pumpkin car Mirror HangingDecoration.
What you will need to crochet the Small Ghost and The Small Pumpkin
- A small amount of White Yarn (I used James C Brett Flutterby and a 4.00mm hook)
- A small amount of Pumpkin Coloured Yarn ( I used a double-knit yarn with 2 strands worked together )
- A small amount of color for the hanging part to tie around the rearview mirror.
- 4.00mm hook
- Tapestry Needle
- Safety Eyes
Small NO SEW Crochet Ghost Pattern
ABBREVIATIONS - Pattern is written in US Terms
I find a magic ring can break easily when starting a piece when you go to tighten it!
I find a magic ring can break easily when starting a piece when you go to tighten it!
SO
You do NOT need a magic ring to start, you will chain 2 and work all the first rounds of stitches into the first chain
sc = Single Crochet
sc-bl = single crochet into the back loops of stitches
sc-fl = single crochet into the Front loops of stitches
4Dctog = work 4 Dc stitches until one step before finishing leaving the last loop on the hook, repeat 4 times until you have 5 loops on the hook, yarn over pull through
SlSt = Slip Stitch
2Hdc into the same stitch = work 2 sts into the same space (increase)
From * To * = Repeat the instructions in Until the End of the Round
Rnd 1: Ch2, working all into the first chain from the hook make 6 sc (6sts)
Rnd 1: Ch2, working all into the first chain from the hook make 6 sc (6sts)
Rnd 2: work 2 sc into each st (12sts)
Rnd 3: *2sc into the next st, sc into the next st, * repeat from * to * around (18sts)
Rnd 3: *2sc into the next st, sc into the next st, * repeat from * to * around (18sts)
Rnd 4: sc into each stitch around (18sts)
Rnd 5: sc into each stitch around (18sts)
Rnd 6: work 4dctogether in the next st, sc into the next 8 sts, and work 4dctogether, sc in each st to end of rounds
Rnd 5: sc into each stitch around (18sts)
Rnd 6: work 4dctogether in the next st, sc into the next 8 sts, and work 4dctogether, sc in each st to end of rounds
(JUST Make sure the 4 double crochet stitches are worked evenly apart )
Rnd 7: sc in each st around (18sts)
Rnd 8: sc in each st around (18sts)
Rnd 8: sc in each st around (18sts)
Working this next round into the front loops only
Rnd 9: In the Front Loops *2 HDC in the next st, slip st into the next st * (27)
Do not fasten off . Pull your loop through to start working the back loops for the next round
Rnd 10: Sc- Bl in each stitch around (18sts)
Attach eyes here middle of Rnd 3 and Rnd 4 with 4sts between the eyes and stuff the ghost lightly to shape
Rnd 11: *Sc in the next st, 2sc-together * Repeat From * to * around
Fasten off and using the tail weave through the remaining stitches and pull to close.
SMALL / TINY Crochet Pumpkin Pattern Car Charm
Using 2 Strands of a Double Knit yarn held together and a 4.00 mm hook, (I am an extremely loose crocheter so please go up a hook size if you feel you need to)
Chain 11. HDC into the 3rd chain from the hook and in each stitch until the end.
Row 2 to Row 11: Ch2, TURN, working into the BACK LOOPS of previous rows sts, Bl- HDC into each stitch across (9sts)
TO assemble the small crochet pumpkin
Fold your piece in HALF A- A and sew this seam.
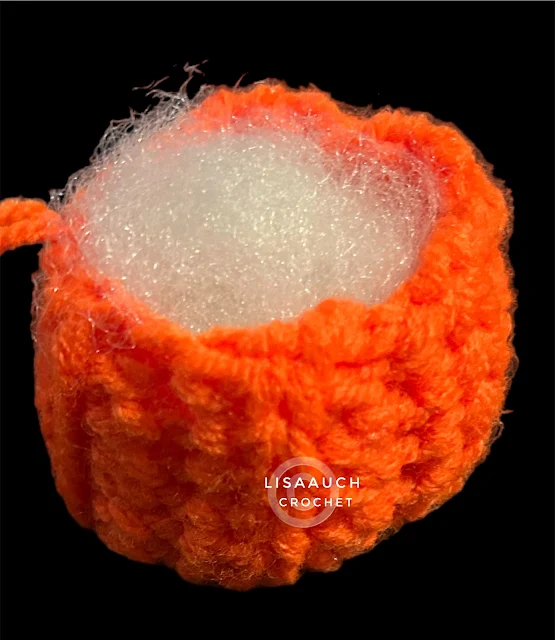
Weaving in and around the Stitches at the BOTTOM C, pull tight to close
ADD a little stuffing here to shape the pumpkin
Weave yarn in and out around the Top Opening of the pumpkin and Pull Tight to finish.
TO crochet the Strand that connects the hanging ornaments I took a contrasting piece of yarn and Chained a length of roughly 80 chain sts.
I sewed through the Ghost and the Pumpkin at opposite ends and weaved in all ends to finish.
Your hanging Mirror ornament is now ready!
Are you in the mood for more Halloween Crochet Patterns?
You can visit more of my FREE Halloween Crochet Patterns HERE on my website
Terms Of Use - Please scroll to read


.jpeg)


.jpeg)


