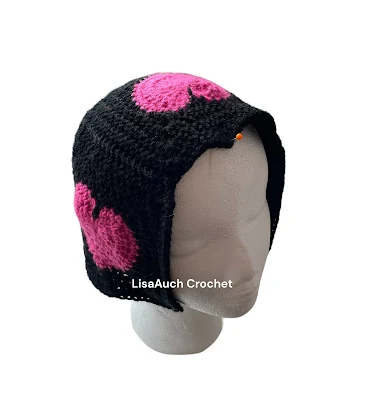
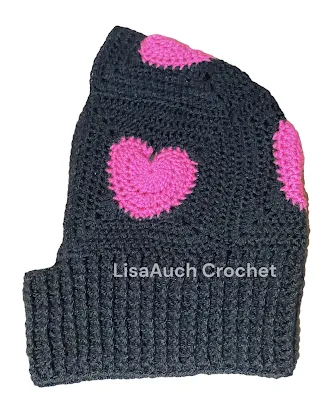
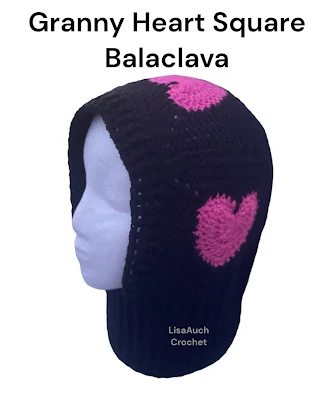
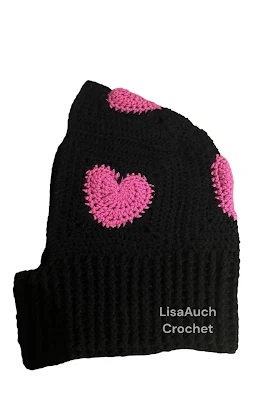
I cannot get over how adorably cute this Simple Crochet Heart Granny Square Balaclava has turned out!
This is a FREE written Crochet pattern with images to help you create it too.
I love how easy these hearts in squares are to crochet, as they work up fast when joining them together making crocheted hats, blankets, or cardigans with the solid heart granny square.
I have a few Balaclava Crochet Patterns already I was asked to crochet a balaclava with the heart granny square and to post it on TikTok.
And now I've written out the instructions for you to not only crochet the heart square but to help you join the heart squares to make a super snug-fit ribbed balaclava
The size I made will fit 20 - 21 inches.
However, you can easily change the sizing to suit by working out the size of squares required.
How to custom fit your crochet balaclava
Head circumference divided by 3 = Size ACROSS your SQUARES need to be.
So my head measures 20-inch circumference DIVIDE by 4 = 1 SQUARE will measure 5 inches
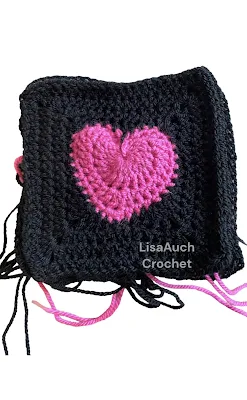
To crochet the solid heart in the square I have written out the full crochet pattern below.
If you would like to see the
written tutorial for the heart granny square pattern please visit this page on my website HERE However, If you are confident follow the instructions below
NOTES: (This crochet heart does not start with a magic ring)
we will NOT be using a magic ring to start the heart
To start the crochet heart you will Loosley chain 4 to start and work ALL the first round of stitches
into the FIRST chain from the hook.
I find this method the BEST and easier to tighten and fasten off securely.
NOTES: I am an extremely loose crocheter, you may need to go up a hook size,
especially when making the sc in round 3.
(make these VERY loose stitches.)
dbltrc = Double Treble Crochet (yarn over 4 times)
trc = treble crochet (yarn over 3 times)
dc = double crochet
sc = single crochet
Crochet Heart in a SQUARE WRITTEN FREE Pattern (Step by Step)
Rnd1:
ch 4, 16 tr into the ring,
work 2 sc down and into the side (post) of the last tr,
sl st into the starting ring.
.jpg)
Rnd 2:
Ch 1,
skip first ch of first ch 4 of round 1,
(working INTO the 2nd and 3rd chain)
sc in next 2 chains of the first round,
(hdc, dc) in the next ch,
2 dc in each of next 2 sts,
hdc in next 4 sts,
4 dc in next st,
hdc in next 4 sts,
2 dc in each of next 2 sts,
(dc, hdc) in next st,
sc in each next 2 sts,
Skip last st, slip into middle of heart to join, ch1
(Work next round LOOSELY)
Round 3: skip 1st stitch, I repeat! Working extremely loosely (Or go up another hook for this round to stop it from curling in on itself).
sc in each stitch around, working 4 sc into the middle of previous rounds (4dc) continue working sc in each stitch around, slip into the LAST stitch of the previous round to finish, and slip to join.
JOIN NEW YARN HERE
Round 4:
starting at the middle of the 4 sc sts of Round 3
Join yarn with a slip st,
sc in next
hdc in next
(dc, trc) in next st,
in the next stitch work (2trc, ch1, 2trc) [corner made]
(trc, dc) in next st,
2dc in next st
hdc in next 2 sts
sc in next st
2 sc in next
in the next st (2hdc, Ch1 2hdc)[corner made]
hdc in next st,
sc in next st,
hdc in next 2 sts.
LONG double crochet into the slip st at ROW 2 of HEART
(first half of Square made)
hdc in next 2 sts
sc in next st
hdc in next st
in the next st (2hdc, Ch1 2hdc)[corner made]
2sc in the next st,
sc in the nxt st,
hdc in next 2 sts,
2dc in next st
(dc, trc) In the next st
in the next stitch work (2trc, ch1, 2trc) [corner made]
(trc, dc) in next st,
hdc in the next st
sc in next st
slip st to join to start
.jpg)
Round 5: (working this whole round in hdc)
Ch2, hdc in base of ch2,
hdc in each st around, working 2hdc, ch1, 2hdc) into each chain 1 corner.
Slip to the top of chain3 to join
REPEAT Round 5 If you are making the Squares for the Bucket hat
REPEAT Round 5 for 2 more rows for the Balaclava
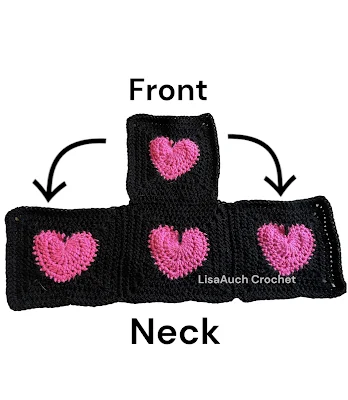
The Layout of the Granny Heart Squares and How to crochet the balaclava.
You will need 4 FULL heart Squares! 7 Rounds in total for a Small/ MEDIUM adult sizes head
Make 4 SQUARES with the Hearts in the middle (Or you can use ANY crochet granny Square
The Layout for the Balaclava
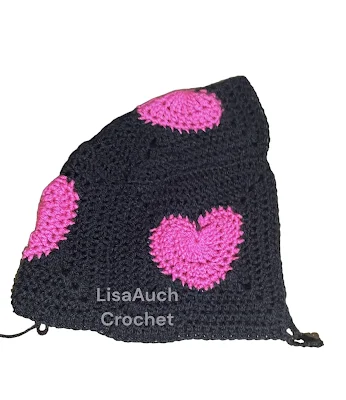
Sew Edges as shown together AS shown and Weave in ALL ENDS
I prefer to sew my edges together using the back loops of the stitches, working over each stitch.
Continue by sewing the side seams together as shown above
CHECK HERE that your Head covering Squares ARE big enough and are a good fit!
IF you feel you want it to be a bit large Simply work a row of half double crochet along the neck.
Mine just sits below my EARS and is a perfect fit.
(Remember the front border will add more depth to the sides and front!)
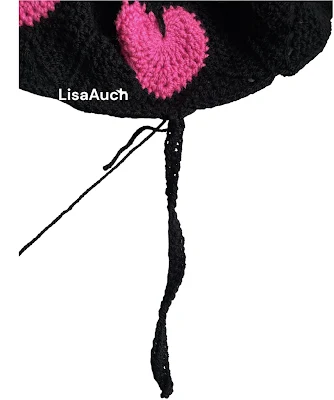
CHIN PART
Join the Yarn at the Botton corner of the balaclava and CHAIN loosely HALF the width of a square, and connect the chain to the opposite corner of the Piece.
Once you have attached the chain to the opposite side of the balaclava. Fasten OFF HERE and weave in all ends!
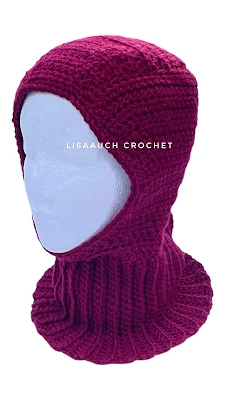
How TO Crochet The Balaclava Ribbing
Please NOTE: IF you do NOT know how to crochet the front post of back post double crochets.
Then an easy way to create the ribbing is by
Joining the Yarn in the Middle center Back of the balaclava, and Chain 30 sts, (Shown in picture)
Working in single crochet into the BACK LOOPS of stitches you can create a super stretchy rib, by working up and down the rows. Slipping into the last stitches of the NECK squares to join the ribbing as you go.
When you come to the Chin part, simply keep working and NOT joining to the piece until you have HALF the width of your square in ribbing, then continue to join the ribbing along the other side to meet back in the middle.
I like the ribbing quite tight so I go DOWN a hook size.
But remember this needs to fit around your whole head when you pull it on.
You will be working in ROUNDS and working in Front Post Double Crochet and Back Post-Double Crochet alternatively.
ROUND 1: JOIN your yarn at the Center MIDDLE BACK of the Balaclava,
Chain 3, and start to work Double Crochet in EACH stitch around, slip to join to top of chain 3,
ROUND 2: Ch3, Front POST Double Crochet, in next st, Back Post Double Crochet in the next stitch., Slip st to chain 3 and slip to join.
ROUND 3: Continue working Round 2 until You have made the ribbing long enough.
Fasten off and weave in ends.
FACE Ribbing of the crochet Balaclava
Join Yarn in ANY corner of the font of the balaclava and with your piece facing you start to work a complete round of Double Crochet, around the sides and front, slip to join
Row 2: Chain 3 front post double crochet, back post double crochet in alternative stitches, repeat around. slip to join.
Round 3: repeat round 2 if required
Thank you for visiting my website or purchasing a pattern. It helps me to maintain the website and buy new materials to make even more FREE PATTERNS. As always you are free to make and sell items you have made from the pattern. You MUST acknowledge LisaAuch.com as the original designer. YOU will NOT copy or distribute the pattern online TEXT OR PDF, in part or whole anywhere else,or by creating an online video of my pattern. Without my express written permission. You can share a picture of the finished item. With a link BACK to a Page with my website on it You must NOT use my pictures in any way to sell a finished product. You must use your own. You will NOT copy or duplicate this PATTERN (whole or in part) onto ANY other SITE online. Without my express written permission. You will not crop or heavily EDIT the images belonging to LisaAuch Crochet/ Lisaauch.com, nor add any further TEXT or Imaging to them.
This pattern/ post may contain affiliate links. Where I may make a small commission from your purchase at no extra cost to you. Happy Hooking (c) All Rights Reserved LisaAuch.com

.jpg)
.jpg)
.jpg)
.jpg)
.jpg)
.jpg)


