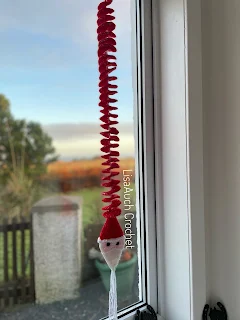
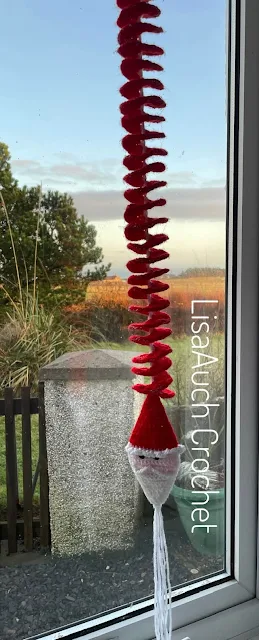
Christmas Santa Crochet windspinner free written pattern. An easy to crochet Christmas Decoration.
This is an easy crochet pattern to crochet a Christmas decoration, and to incorporate a little bit of craft and crochet.
Add a little bit of Glitter if you wish to add extra sparkle to your Christmas wind spinner. The pattern and photos will help you to create the most adorable Santa Crochet wind spinner.
I will give you a clear and easy-to-understand written crochet pattern. And also included several photos to help you create this beautiful eye-catching Christmas Crochet decoration.
The original Windspinner crochet pattern was made in the Summer.
 |
| Crochet BEE windspinner |
I had crocheted a little bee and made the spinner in the same colours, since the Bee wind spinners creation.
I have been asked to add several more ideas and crochet patterns for creating the crochet wind spinners in several themes.
And now The Free Crochet Pattern for the Christmas Santa Windspinner.
This is a fabulous yarn stash-busting project I actually used a little half ball of 100g of yarn and a little pink and white to finish.
I have used a 3.5omm hook (I DO crochet extremely loosely )
I used a Double Knit weight yarn - See Special Deals on Yarn here at the Knitting Network
The Windspinner Crochet pattern for THIS wind spinner is made a little bit differently from the original pattern.
It is made with MORE increases in the rounds than the original.
Which gives you a tighter Spiral.
If you prefer a looses spiral make 2Dc in each stitch rather than 3Dc
This is because the wind in winter is WAY stronger (well I say that I live in the North of Scotland)
I found I needed a much tighter Windspinner to be able to withstand the wind and not sway and much.
Please NOTE:
You will always start at the SAME END of the Windspinner this will become the TOP.
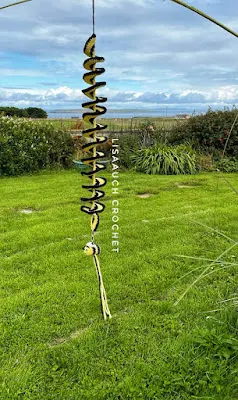
AND you may find as you work your spiral has gone a little wiggly,
Like This
Do not worry.
Once finished Start at the TOP and slowly curl and straighten as you go and
wind the spiral into shape.
TO Start the Windspinner.
Ch 100 + 1
Row 1:
Single crochet in 2nd ch from hook and in each chain until end. FASTEN OFF
Return to the START of Row 1 and Join RED
Row 2:
chain2, 3 Double crochet in EACH stitch until you reach the end. FASTEN OFF.
Return to the START of Row 1 and Join RED
Row 3:
chain2, work 3 Double Crochet in EACH stitch until you reach the end.
FASTEN OFF.
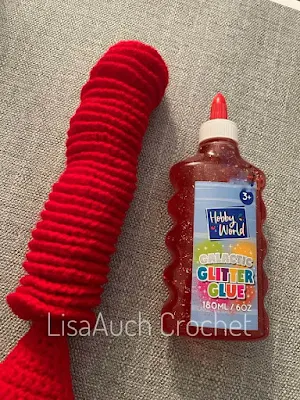
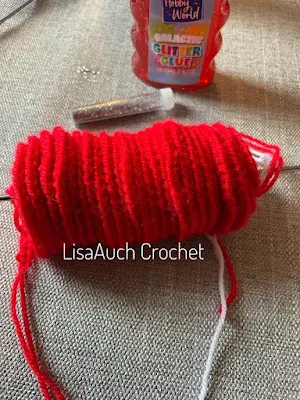
I like to wind the wind spinner using a knitting needle to hold it in place. This also allows me to paint dome glitter around the edges easily.
(Just do not let it dry like this remove from the knitting needle immediately and hang to dry!)
The Diamond Shaped SANTA Decoration pattern for the Bottom of your wind spinner.
I made the Santa decoration 2D so you could also just make the Santa decoration
to hang from your tree branches.
You will increase in the SECOND stitch of each row this makes the diamond shape
less gappy at the edges when you go to join.
Start the Santa In WHITE:
Rnd 1: Ch2, Work 1 sc into the 2nd chain from the hook, TURN
Rnd 2: Ch2, work 2sc into the next st. TURN (2sts)
Rnd 3: Ch2, work sc into the base of ch2, 2sc into the next st. TURN (3 sts)
Rnd 4: Ch2, work sc into the base of ch2, 2sc into the next st. sc to last st TURN (4 sts)
Rnd 5 : Ch2, work sc into the base of ch2, 2sc into the next st. sc to last st TURN (5 sts)
Rnd 6: Ch2, work sc into the base of ch2, 2sc into the next st. sc to last st TURN (6 sts)
Rnd 7: Ch2, work sc into the base of ch2, 2sc into the next st. sc to last st TURN (7 sts)
Rnd 8: Ch2, work sc into the base of ch2, 2sc into the next st. sc to last st TURN (8 sts)
Rnd 9: Ch2, work sc into the base of ch2, 2sc into the next st. sc to last st TURN (9 sts)
Rnd 10: Ch2, work sc into the base of ch2, 2sc into the next st. sc to last st TURN (10 sts)
(You will join PINK HERE)
(Santas Beard/ Moustache)
TURN work Chain 14 and slip stitch to Join the chain to the first chain you have just made
at the beginning of Row 10
Starting at the END of row 10
Change to Pink
Rnd 11: Ch1, work sc into the base of ch, 2sc into the next st. sc to last st TURN (11 sts)
Rnd 12: Ch1, work sc into the base of ch, sc in next 4 sts, pick up the chain length to this level
and work OVER this chain as you work the NEXT single crochet and join it to this ROW,
continue sc to last st TURN ( 11 sts)
You will now make his nose in this Row.
Row 13: Ch1, work sc into the base of ch1, 2sc into the next st. sc to last st TURN (11sts)
Row 14: Ch1, sc into the base of ch1, sc in next 4sts, work 5 together into the NEXT Stitch, Sc to end.
Change to WHITE (santas hat fluff)
Row 15: Ch3, slip stitch into the FRONT LOOP of the previous row,
(Ch3, Slip stitch into the BACK LOOP of the next st)
Fasten off
Join RED (Santas hat )
Row 16: Ch1, Working in the Back loops, SC in each stitch across. TURN (11sts)
Row 17: ch1, working in both loops continue in SC and work in each stitch across. (11sts)
Row 18: Ch1, DO NOT work a stitch into the BASE SC in each stitch across. (10sts)
Row 19: Ch1, DO NOT work a stitch into the BASE, SC in each stitch across. (9sts)

