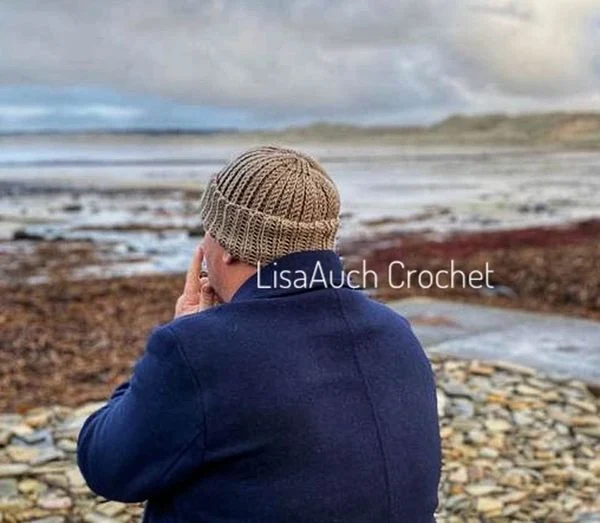
Do you want to know how you can make a Knit-Look Crochet Hat. with our easy-to-follow free hat crochet pattern.
The pattern is so easy and offers adjustments to crochet the hat for all sizes, making it ideal for crocheting cozy hats for your entire family.
The Crochet Hat Pattern below will guide you through the process of creating the hat using the knit-look crochet stitch that is extremely easy and creates a warm cozy hat.
.
I am going to call this hat The ‘NO Bulk Crochet HAT’. Why is it called the no-bulk hat?
Well, I love to crochet hats especially chunky crocheted hats that look like they are knitted but found when sewing the top of the hat shut, it was so bulky! SO I have added in instructions on how to make the hat less bulky at the top.
Especially ribbed crochet hats as I love the look of knitted ribbing but cannot knit!
And when I made any bulky weight crocheted hat made in a rectangle it was so bulky at the crown when you pulled to close the crown.
I also love creating EASY crochet patterns for hats, and my favorite way is to crochet in ROWS, turning at each end and working back down the crochet hat.
I LOVE my husband's crocheted beanie-type hat, but when I wanted to use chunky yarn for a new hat I found the top ugly and too bulky to close tightly

Sometimes The problem with hats made like this is IF we use heavier yarn, say a bulky weight we can't close the top of the hat off neatly as there is just SO much chunky yarn to pull to tighten.
So I have come up with the perfect solution.
The No Bulk Crochet Hat pattern is easy to close at the crown and does not go all funny or too bulky at the crown like most of the crochet hats made in a rectangle do.
Is it easy to crochet a hat that looks knitted?
Oh my goodness yes it is really easy to make crochet stitches look like they are knitted!
I get asked this all the time and my response is YES it IS SO easy to crochet a hat that looks knitted.
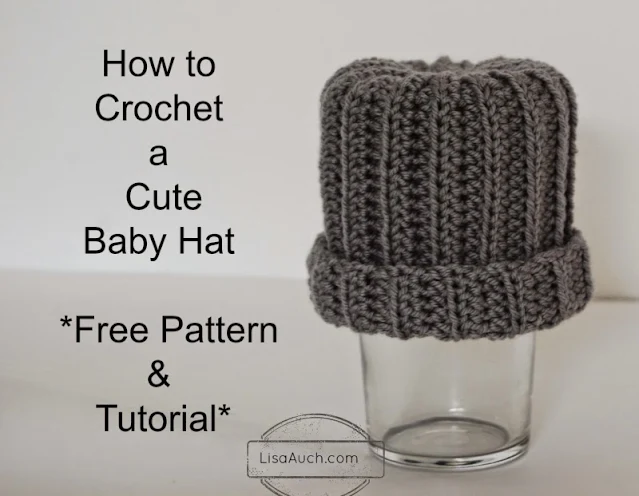
The easiest WAY to crochet a hat that has a knitted look is by using a technique called "working INTO the back loop only of the stitch " (BLO). Like I did here with the Easy baby hat
Working this crochet ribbing effect technique involves only inserting your hook into the back loop of each stitch, rather than both loops, as you would normally do.
By working into the BACK LOOP ONLY (usually written BLsc, or whatever stitch after the BL)
This creates a similar look to knitting and can be used to create crochet ribbing for cardigans, hats, and lovely, textured crochet items.
What hook yarn do you need to crochet Ribbing that looks knitted?
You can USE ANY Yarn and ANY HOOK that is compatible with each other to crochet a hat using the Crochet hat sizing chart BELOW.
When I am making anything crocheted in a ribbed stitch I prefer to use a hook that is one size smaller than what is recommended for the yarn you're using to create a tighter, more knitted-like fabric.
You can see how I use the crochet ribbing here on the sunflower crochet cardigan cuffs
As I previously mentioned many crochet hats are made in a rectangle can be very bulky at the top when we gather the stitches together at the top and try to pull them together to tighten.
Please note the bulk is Not AS noticeable in a baby hat but when you size the hat up it does have a lot of bulk at the crown of the hat.
So I set out to try to work around this and crochet a hat with less bulk at the top
How will we achieve the Ribbing knit look for this 'No Bulk Crochet hat '
The ribbing does not show especially great in the picture but believe me it's awesome in real life.
It makes such a thick, bulky, and Cosy Warm hat. I used 2 strands of Aran weight yarn that worked together.
The knitted crochet rib effect is going to be created by working a half double crochet SLIP ST, INTO the Back Loop of the Previous rows BL- HDC slst
Is it easy to crochet a Hat that looks knitted? Yes it is very easy to crochet a knit look crocheted hat.
When you Crochet a Ribbed Crochet Hat in a rectangle like the one above you would
- Start by chain-crocheting the desired number of stitches for the height of the hat.
- Turn your work and work single crochets (OR chosen Stitch) into the back loop only (BLO) for the desired number of rows for the brim.
- Continue working into the Back loops for the remainder of the hat. You are making a rectangle.
- Once you've reached the desired WIDTH (Circumference) of your hat, you will then fold the hat in half and sew the short seams together to create a cylinder.
- Once at the TOP of your hat you will thread your needle and yarn around the TOP of the hat and pull tightly to close.
Of course, You can also use any other crochet stitches worked into the back loop, such as single crochet or double crochet to achieve the knitted ribbed look, or work into the 3rd hidden loop in the Half double crochet stitch.
I have a crochet pattern for a hat HERE that is perfect for beginners, step by step images and makes a lovely ribbed textured hat.
Working Only into the back loops of previous rows of stitches
How to crochet a HAT that fits ANY SIZE. This is my Own Crochet Hat Chart Measurements and sizing I use to crochet my hats. You may need to make your screen Bigger to read the full sizes.
Easy No Bulk Crochet Hat Pattern
YARN used for this hat - Wilko Aran weight YARNand 2 strands together,
HOOK 7.00mm hook
NOTES work loosely! it is really important GO UP a hook size if you are finding it difficult to insert your hook into previous stitches, or it can get tricky trying to get the hook into these stitches
Abbreviations:
BL-HDC-SLST - Back loop Half Double Crochet Slip Stitch
BL-slst = Back loop slip stitch
ch = Chain
slst - slip stitch in back loop
sts. - Stitches
To Start:
Chain LOOSLEY to the length required ( I was 11.5 inches for a small adult) PLUS 2 extra chains to start
Row 1: Working INTO the 3rd chain from your hook work BL-HDC-SLST in each chain UNTIL the LAST 5 stitches. BL-slst in the last 5 sts. Ch1 LOOSLEY, TURN
Row 2: Slip stitch into the first 5sts, Then BL-HDC-SLST into the remaining stitches,. Ch1 LOOSLEY, TURN
Row 3: BL-HDC-SLST in each chain UNTIL the LAST 5 stitches. ( DO NOT work the last 5 slip stitches, LEAVE these unworked) Ch1 TURN
Row 4: BL-HDC-SLST into the remaining stitches, Ch1 LOOSLEY, TURN
Row 5 : BL-HDC-SLST in each chain to the LAST 5 stitches. skip OVER to the first of the 5 slip stitches and, BL-slst in the last 5 sts. Ch1 LOOSLEY, TURN
Row 6: Slip stitch into the first 5sts, Then BL-HDC-SLST into the remaining stitches,. Ch1 LOOSLEY, TURN
Row 7: BL-HDC-SLST in each chain UNTIL the LAST 5 stitches. Ch1 TURN ( DO NOT work the last 5 slip stitches leave these unworked)
Row 8: BL-HDC-SLST into the remaining stitches, Ch1 LOOSLEY, TURN
Row 9 : BL-HDC-SLST in each chain to the LAST 5 stitches. skip OVER to the first of the 5 slip stitches and, BL-slst in the last 5 sts. Ch1 LOOSLEY, TURN
Row 10: Slip stitch into the first 5sts, Then BL-HDC-SLST into the remaining stitches,. Ch1 LOOSLEY, TURN
ROW 11: BL-HDC-SLST in each chain UNTIL the LAST 5 stitches. ( DO NOT work the last 5 slip stitches, LEAVE these unworked) Ch1 TURN
Continue working in the ESTABLISHED pattern Until you reach the desired WIDTH/ Circumference of hat is achieved. (Continue repeating the sequence of ROWS 2 through to Row 5)
FOLD the hat in HALF (first chain row to the LAST row worked) to make a tube
Sew evenly and neatly through the first and LAST rows of stitches to join the hat seams
Once you have reached the TOP of your hat Start weaving in and out around the TOP side stitches.
PULL TIGHT TO CLOSE , Fasten off
You can PIN this image to pinterest Thankyou
I have several more crochet HAT Patterns Available for FREE on my Website
Thank you for visiting my website or purchasing a pattern.
This pattern may contain affiliate links. Where I may make a small commission from your purchase at no extra cost to you.
PLEASE READ FULL TERMS of Use Below
Happy Hooking (c) All Rights Reserved LisaAuch.com


.jpg)


.jpg)

.png)

.jpg)

.jpg)
.jpg)
.jpg)
.jpg)

