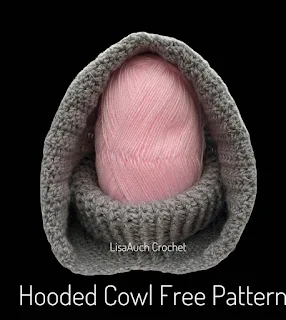
This crochet hooded cowl is so cozy and warm and it is VERY easy to a crochet project.
I have now several free crochet hooded cowl patterns and balaclavas.
The Granny Square Crocheted Hooded Cowl is both fashionable and in trend this season!
| FREE Crochet Pattern for the Balaclava Hooded Cowl made from Granny Squares HERE |
or you can see the Snug Fitting Balaclava Pattern HERE
Snug Balaclava Crochet Pattern FREE HERE |
The Neck is extremely warm and cozy in this hooded cowl Because you have used 2 strands of double-knit yarn it makes a super bulky hooded cowl.
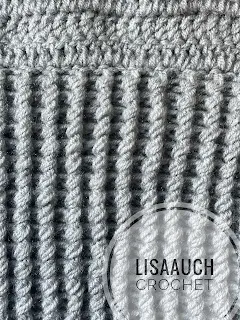
I decided on a lovely textured rib stitch working into the Front and Back posts for the Turndown Turtle Neck and just plain Double crochet stitches for the Hooded part.
 |
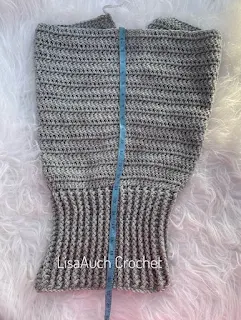
| Ribbing is made first then the Double crochet rows are added to the top of the ribbing. |
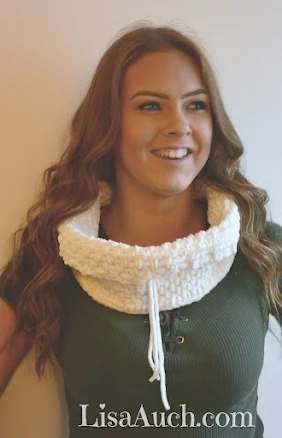 |
My Daughter wearing the Easy Super Bulky Crochet Cowl |
- The Turtle neck is made first and would make an awesome warm cozy cowl just on its own.
- To join the hood we will turn the ribbing inside out and work the double crochet.
Sound complicated - No not at all this is a VERY easy crochet pattern, and suitable for beginners.
Trust me it works out once all is finished.
For this Coodie I started with chain 70, but you may need more or less if you need it bigger.- ch - chain
- dc - double Crochet
- Front Post Double Crochet, - FPdc
- Back Post-Double Crochet - BPdc
Crochet Hook Size 6.00mm hook
Using 2 Strands of Double Knit Yarn ( I used King Cole) I used nearly 600g of This yarn.As always please reach out to me if you need me and I would love to see your finished items
so tag me #lisaauchcrochet so I can find it easily
Written Pattern for the Crochet Hooded Turtle Neck Cowl aka 'Coodie'
Ch 70
Join the 1st and last chain together to create a circle, and ensure the chain is not twisted, *this must be able to pass easily over your head so if you need to add more or less please do so making it an even number)
How to crochet the Hood PART
- TURN your work inside OUT.
- You will work the hood to the opposite side of the turtle neck
- We will now be crocheting in double crochet In ROWS back and forth to create the hood.
- Find the back seam and make it the center back.
- Find the Middle front of the Cowl
- JOIN your Yarn in the middle front stitch of the Ribbed cowl piece.
- Hood is crocheted in ROWS Do not join rows but TURN your work
Row 1: Ch3, Double crochet into the base of chain 3, dc in each stitch around
(DO NOT JOIN) NOTE: you will increase by 2 stitches in each alternative row, in the 2nd stitch and the 2nd last st of rows. This is to make the Turn Back on the hood.
Row 5: Row 2: Ch3, Dc in the base of ch2, 2dc in next st, Dc in each stitch until the 2nd last 2 stitches, 2dc in next st, dc in last st, TURN.
Row 6 - Row 11: Repeat Rows 4: and Row 5 :
NOTE: if you are happy with the length of the hood (remember it needs to sit comfortably all the way down to the bottom of the turned-up turtle neck)
Row 12 to Row 24: dc in each stitch, ch3, TURN (HINT)
I love it quite loose so I carried on for another 10 rows of Double crochet.
Fasten off leaving a long tail, or carry on until you are happy with the length of the hood
Use the Longtail to join the TOP of the Hood and sew neatly and evenly along the TOP.
To join seams.
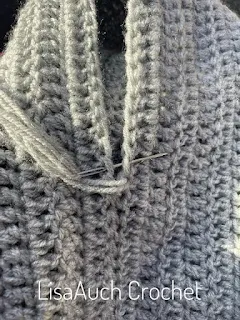 |
| Sew through BOTH loops of stitches of the last row to JOIN |
Weave in and finish off all ends.
I have many more FREE crochet Hat Patterns available on my website, Enjoy looking through my free crochet patterns
I LOVE my grandson in his pixie bonnet. So we can be matching.
It is also a FREE crochet PATTERN on my website
FREE Baby Bonnet Crochet Pattern HERE
 |
| my grandson in his own little crocheted bonnet |

