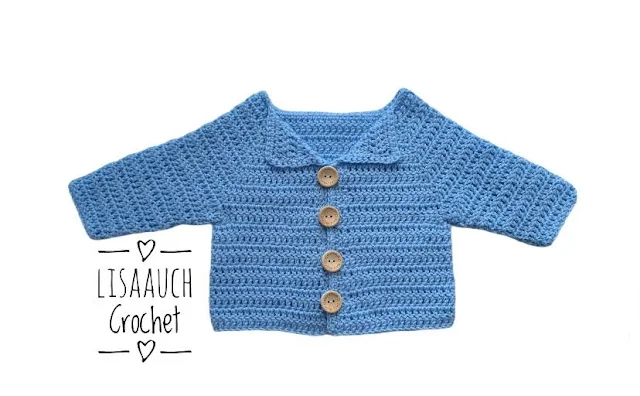
Free Crochet Pattern for a Newborn + Baby Cardigan which is worked in Double Crochet using a 4.00mm hook.
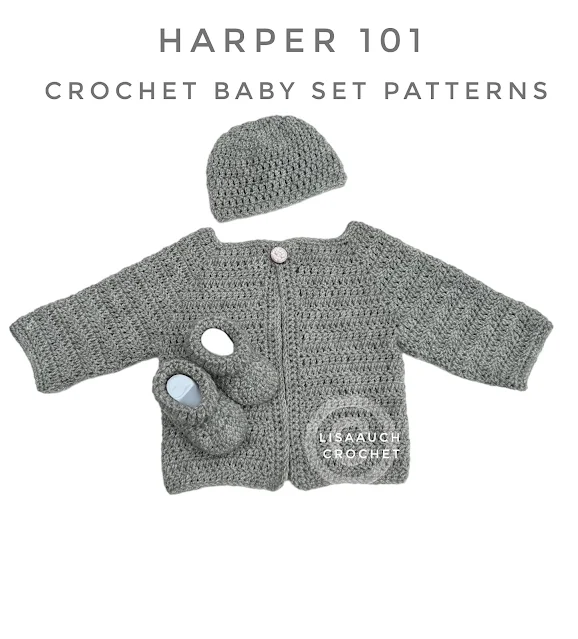
Please note you can buy This easy crochet baby cardigan which is also part of the Harper Baby 101 Crochet Set Pattern
BUY the Full Baby Set HERE
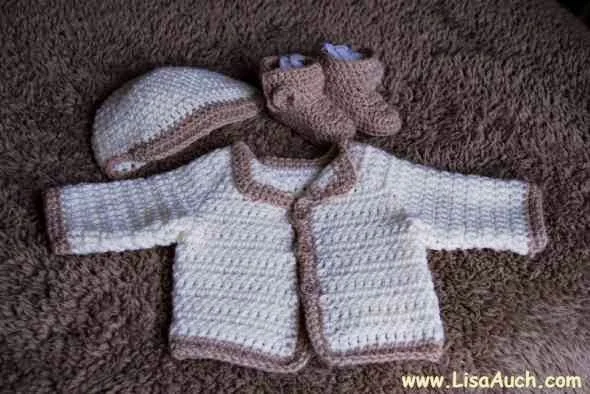
Harpers Baby Cardigan set was brought about because when I made the Megans Crochet Baby Cardigan Pattern (as Pictured in this Image below) It was originally made using an Aran weight yarn.
Many have asked for the same simple styled cardigan in Double Knit =Worsted weight.
 |
| Megans Baby Cardigan FREE pattern HERE |
This free pattern for a newborn crochet cardigan is made with double-knit yarn and a 4.00mm hook.
The finished cardigan will measure approximately 19 inches around the chest area and is designed to fit a 0-3 month baby.
Please ensure that all measurements are achieved, as it’s better to be a bit bigger than too small.
| Measurement | Size (inches) |
|---|---|
| Chest (in.) | 16 inches |
| Center Back Neck to Wrist | 10.5 inches |
| Back Waist Length | 6 inches |
| Cross Back | 7.25 inches |
| Shoulder to Shoulder | 7.25 inches |
| Arm Length to Underarm | 6 inches |
| Armhole Depth | 3.25 inches |
| Sleeve Width | 5.25 inches |
| Length of Cardigan | 10 inches |
Materials you will need
Buttons (you can add as many buttonholes as you wish on the final border round.
Written in US terms
Please read all the notes throughout.
If you find you are getting holes at the beginning of the ROW then I highly suggest watching this video below for an alternative Start/ Turning Chain
PATTERN for Cardigan Starts HERE
Ch at the start counts as a stitchch58,
ROW 1: dc in 4th ch from hook, dc in the next 7ch sts (Front), 3dc in next ch, dc in the next 9ch sts (Shoulder), 3dc in next ch, 1dc in the next 18ch sts (Back), 3dc in next ch, dc in the next 9ch sts (Shoulder), 3dc in next ch, 1dc in the next 8ch sts (Front) Turn. (63dc ).
ROW 2: Ch3, dc in the next 8sts, 3dc in next ch, dc in the next 11 sts, 3dc in next ch, 1dc in the next 20sts, 3dc in next ch, dc in the next 11sts, 3dc in next ch, 1dc in the next 9sts, Turn.
ROW 3: Ch3, dc in the next 9 sts, 3dc in next ch, dc in the next 13sts, 3dc in next ch, 1dc in the next 22sts, 3dc in next ch, dc in the next 13sts, 3dc in next ch, 1dc in the next 10sts, Turn.
ROW 4: Ch3, dc in the next 10sts, 3dc in next ch, dc in the next 15sts, 3dc in next ch, 1dc in the next 24sts, 3dc in next ch, dc in the next 15sts, 3dc in next ch, 1dc in the next 11sts, Turn.
ROW 5: Ch3, dc in the next 11sts, 3dc in next ch, dc in the next 17sts, 3dc in next ch, 1dc in the next 26sts, 3dc in next ch, dc in the next 17sts, 3dc in next ch, 1dc in the next 12sts, Turn.
Row 6: Ch3, dc in the next 12sts, 3dc in next ch, dc in the next 19sts, 3dc in next ch, 1dc in the next 28sts, 3dc in next ch, dc in the next 19sts, 3dc in next ch, 1dc in the next 13sts, Turn.
ROW 7: Ch3, dc in the next 13sts, 3dc in next ch, dc in the next 21sts, 3dc in next ch, 1dc in the next 30sts, 3dc in next ch, dc in the next 21sts, 3dc in next ch, 1dc in the next 14sts, Turn.
ROW 8: Ch, 3dc in the next 14sts, 3dc in next ch, dc in the next 23sts, 3dc in next ch, 1dc in the next 32sts, 3dc in next ch, dc in the next 23sts, 3dc in next ch, 1dc in the next 15sts, Ch3 Turn. (120 sts)
ROW 9: On this Row, you are going to create the Armholes.
ch3, 1dc in next 16dc, ch2, skip next 25 sts, 1dc in each of next 36sts, ch2, skip next 25sts, dc in each st to end. (73sts)
Row 10: Ch3, dc in each stitch, TURN
Row 11: Repeat Row 10 until work measures approx 10 Inches from shoulder. Finishing on a RIGHT SIDE ROW. DO NOT FASTEN OFF
START 1st row of BORDER: With Right Side facing start at the bottom corner with a 4.00mm hook,
1st Border Row: Ch1, 1sc into the base of ch1, work sc evenly into row ends up the first front edge to the front top corner, work (sc, ch1, sc) into corner stitch, continue working 1sc into each ch around the neck to next top corner, (sc, ch1, sc) into the corner, continue working evenly into row ends down the second front edge, to bottom corner, (sc, ch1, sc) into corner, ch1, work 1sc into each dc along the bottom of the cardigan to end, ss to first sc on beginning of row.
Cardigan Front Edging and Buttonhole Rows:
Make the buttonholes spaced apart evenly where you wish the buttonholes to be on the cardigan.
Row 2: Ch1, 1sc into the base of ch1, 1sc into each sc to last st
Row 3 of Border: work 1sc into the base of ch1 sc to the first buttonhole *make 2ch (OR ch1 depend on the size of buttons being used), miss 1sc, 1sc into each of next 8sc*) Repeat for as many buttonholes as you would like, sc to second last st ch1, slip to join. Fasten off
Remember LOOPS ON LEFT for BOY. LOOPS on the right-hand side for GIRL. So you will need to adjust the following Rows to accommodate which side you are making them on
Before proceeding with these next 2 ROWs of the FRONT of the Cardigan you may wish to mark out evenly spaced holes before starting the buttonhole row
FASTEN OFF HERE
Sleeves:
Rnd 1: Join yarn to the center of one of the underarm sts, between the 2 chain sts you made in ROW 8, and Make sure this row is worked in the opposite direction that Row 8 was worked.
Ch3, (counts as the first dc) Work Dc evenly around the armhole
(You will work 2dc into a SIDE POST of a ROW 10 dc stitch at Armhole.
Slip stitch to Join to ch3 to join, TURN
Rnd 3: Ch 3, dc into the base of the chain, and dc in each st around, Slip stitch to Join, TURN
Rnd 4: Ch 3, dc into the base of the chain, and dc in each st around, Slip stitch to Join, TURN
Rnd 5: Ch3, From now on DO NOT WORK the first dc st into the base), but in the next dc st, dc in each st around, TURN (by doing this you will decrease 1 stitch per round)
Rnd 6: to Rnd 10: Repeat Rnd 5 (IF you are making for a larger baby add another 2 rows HERE
Row 11: Ch1, 1sc in each dc to end, sl st to first sc. Turn.
Row 12: Ch1, 1sc in each dc to end, sl st to first sc. FASTEN OFF. Weave in ends
I have also sized up the double crochet Cardigan pattern into the next size suitable for a 3+ month
See the FULL FREE Pattern on my website HERE
Thank you for purchasing a pattern from Me! or by visiting my website.It helps me to maintain the website and buy new materials to make even more free patterns
As always you are free to make and sell items you have made from the pattern
However, you must NOT copy or distribute the pattern online TEXT OR PDF, in part or whole anywhere else,
or by creating an online video tutorial of my pattern. Without my express written permission.
You can share the picture of the finished item. With a link BACK to this page.
You must NOT use my pictures in any way to sell a finished product. You must use your own.
You will NOT put this PATTERN (whole or in part) on to ANY other SITE online.
Without my express written permission. This pattern may contain affiliate links. And will be highlighted in blue.
Where I may make a small commission from your purchase at no extra cost to you
Happy Hooking
(c) All Rights reserved LisaAuch.com


