
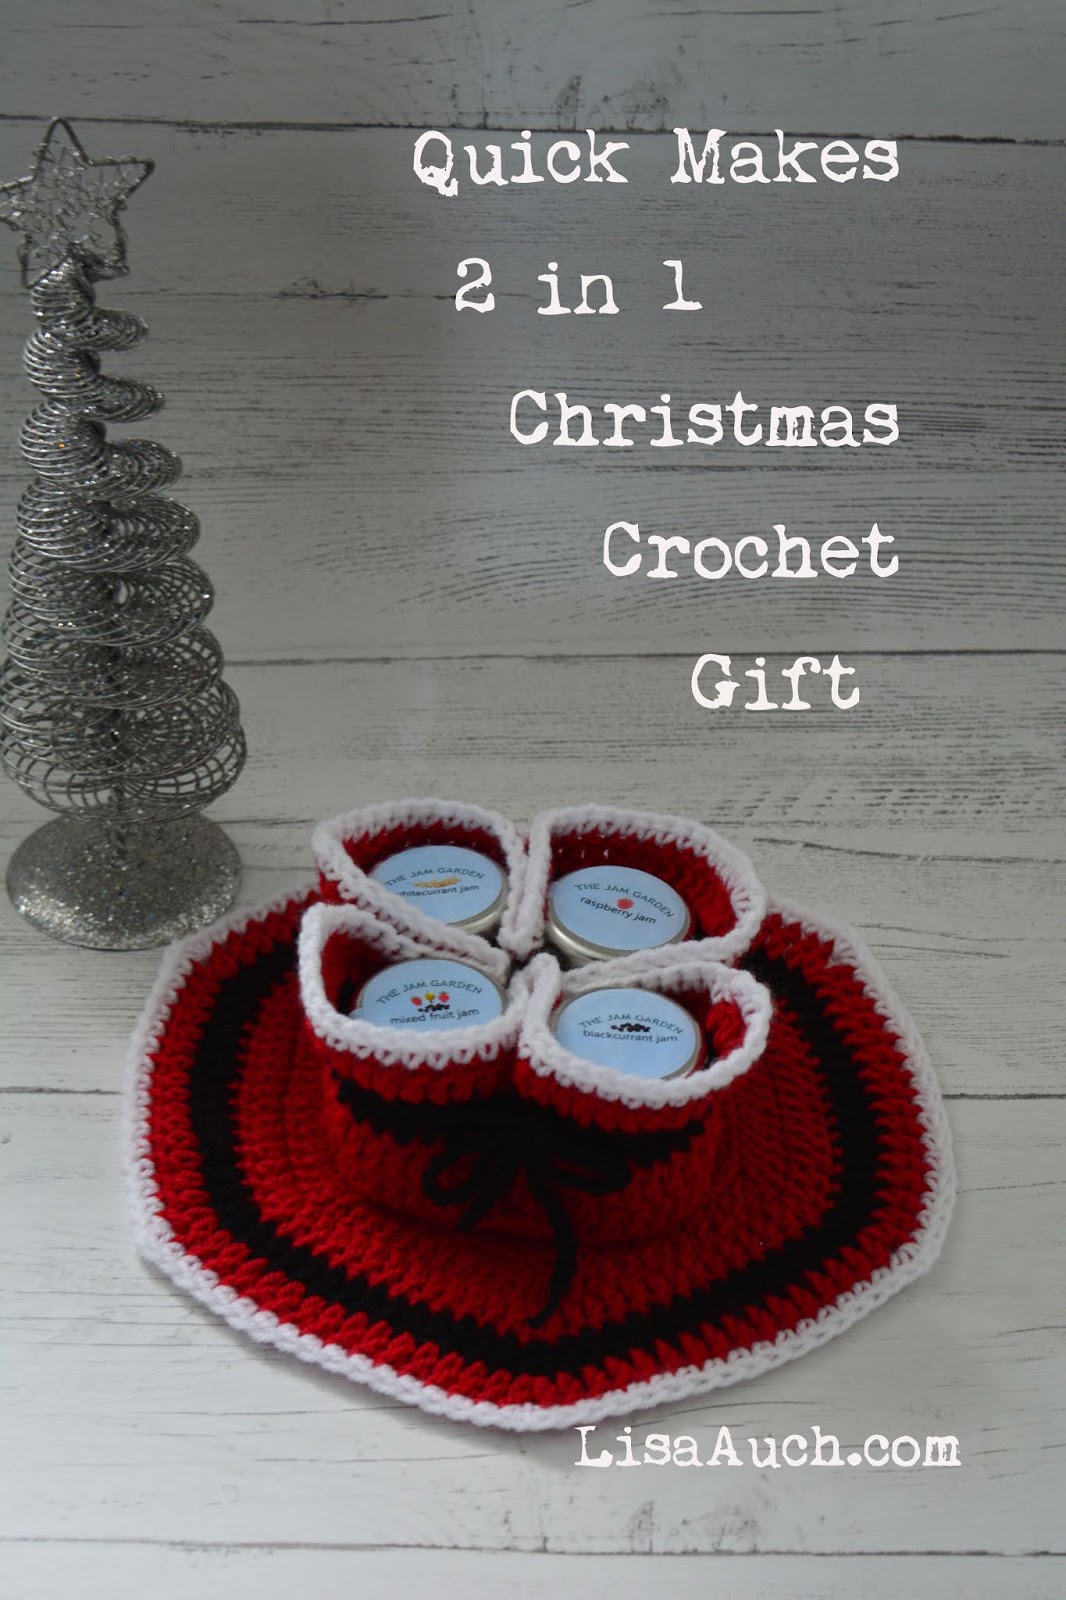
A FREE Christmas Crochet Pattern. This is a last-minute quick easy Crochet gift make (I made it in less than an hour). Not only is it a little jam-pot holder Perfect for the Christmas Morning Breakfast.
And once you have used all the Jam it turns into a lovely Christmas Potholder. That can be used time and time again.
")
What do you Buy the Mother-in-law who wants 'nothing'. Yeah I know your pain.
Well my mother-in-law is actually quite easy but I love to find her little things that are special that are not off the shelf.
We live on a farm and are very lucky to have great neighbors, some make their own products and we are spoiled by one in particular neighbor whose specialty is JAM! Homemade Jam....nothing beats this.
Thickly spread on your toast. or as we like to do is make waffles.
SO when my mother-in-law visited last time we had been given some, and she loved it. Telling everybody back home about this wonderful Jam! Fortunately for us.
Our neighbor has turned her Jam into a Homemade Business, SO I put an order in, and wanted to add a bit of crochet decoration to the little Pots.
SO looking around for Christmas Crochet ideas I didn't really find anything for the little post. So this is what I came up with.
You can use any colors for these it's just I used Christmassy Colours.
You can use any colors for these it's just I used Christmassy Colours.
The Christmas Placemat Pattern
You will Need
50g of Red Yarn
A small amount of Black
Smaller amount of White
3.50 hook
you will slip to join at the end of each round.
IN RED
Rnd1: ch2, into the first chain, make 6 sc, slip to join to firstRnd2: ch1. 2sc in each stitch around slip to join
Rnd 3: ch1, *2sc in the first stitch, sc in next* repeat around slip to join
Rnd 4: ch1: *2sc in the first stitch, sc in next 2 sts* repeat around slip to join
Rnd 5: ch1: *2sc in the first stitch, sc in next 3 sts* repeat around slip to join
Rnd 6: ch1: *2sc in the first stitch, sc in next 4 sts* repeat around slip to join
Rnd 7: ch1: *2sc in the first stitch, sc in next 5 sts* repeat around slip to join
Rnd 8: ch1: *2sc in the first stitch, sc in next 6 sts* repeat around slip to join
Rnd 9: ch1: *2sc in the first stitch, sc in next 7 sts* repeat around slip to join
Rnd 10: ch1: *2sc in the first stitch, sc in next 8 sts* repeat around slip to join
Rnd 11: ch1: *2sc in the first stitch, sc in next 9 sts* repeat around slip to join
Rnd 12: ch1: *2sc in the first stitch, sc in next 10 sts* repeat around. slip to join.
Rnd 13: Working into the BACK LOOP of each stitch, 2dc in the first stitch, dc in next 11sts,
(2dc,ch1, 2dc) in the same stitch* repeat around and finish with a 2dc, ch1 in last space. slip to join
Rnd 14: 2dc in the first stitch, dc in next 12sts, (2dc,ch1, 2dc) in the same stitch* repeat around and finish with a 2dc, ch1 in Last space.
Fasten off and weave in ends slip to join
Change to Black
Rnd 15: 2dc in the first stitch, dc in next 13sts, (2dc,ch1, 2dc) in the same stitch* repeat around and finish with a 2dc, ch1 in Last space.slip to joinFasten off and weave in ends
Rnd 16: 2dc in first stitch, dc in next 14sts, (2dc,ch1, 2dc) in same stitch* repeat around
and finish with a 2dc, ch1 in Last space. slip to join.
Fasten off and weave in ends.
Change to White
Rnd 17: sc in the first stitch, sc in next 14 sts, (1sc, ch1, 1sc) in the same stitch* repeat around, slip to join.Fasten Off and Weave in Ends.
TOP TIP: slip stitch Xmas Messages onto the Middle of the Right Side of the Pot Holder.
To arrange the jams into the holder
Sit 4 small pots of jam into the middle of the Potholder, Pick up the piece between the pot and pull into the middle - do this 4 times.
Secure with a ribbon or
Chain a length (IN black) long enough to go around the 4 pots in the holder just sitting under the lids to help keep them secure, and tie in a bow.
