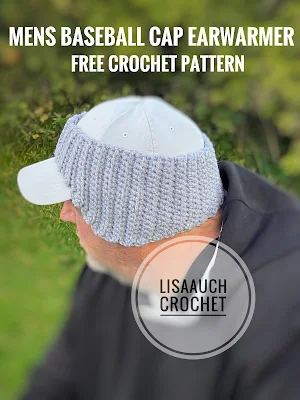
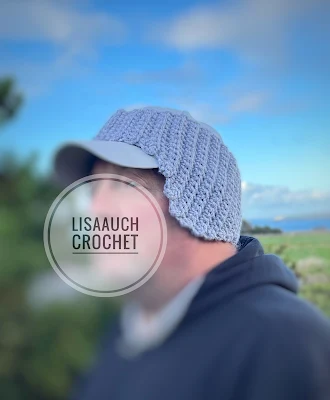
MY HUSBAND'S Crochet EARWARMER Headband was crocheted specifically to fit over a Peaked baseball cap.
 |
| Baseball Cap Earwarmer Headband He just loves his crocheted baseball cap warmer. |
The shaped earwarmer is a beginner-friendly easy ear warmer pattern, that can be worn over a baseball cap or a hat with a peak!
This means you can keep the style of the peaked cap yet still keep your ears warm
This is a free crochet baseball cap ear warmer pattern available on the website, however, you will be able to purchase an AD FREE printable PDF from Ravelry - Paypal Checkout - you can see my ALL designs I have for sale HERE
 |
| Mens Crocheted earwarmer to go over his baseball cap. |
easy ear warmer that can be worn over a baseball cap or a hat with a peak!
This means you can keep the style of the peaked cap yet still keep your ears warm
MATERIALS
SIZE: One (for the GREY one as pictured) it is pretty versatile size-wise due to working the stitches into the back loops giving the headband ear warmer some stretch.
Yarn: 2 Strands of ARAN weight worked together) You need 8oz. of your color of choice.- - SEE yarn DEALS HERE@ AMAZON.com
Hook Size: G/5:50 mm
Yarn Needle to finish off ends
GAUGE: 7 sts = 2 inches
What you will need to know to crochet the MENS Earwarmer
Headband is worked in ROWS, in the Back loops of previous rows stitches
Ensure you are working the earflaps both on the right side
2sctog - work 2 single crochet stitches together
3sctog - Work 3 single crochet stitches together
 |
| This is the Shape of the crocheted Earwarmer headband BEFORE sewing together |
Men's Winter Ear Warmer Headband.
This crocheted ear warmer was specifically designed to fit over his baseball cap, to keep his ears warm, whilst out golfing.
Here in Scotland it can be a beautiful sunny day, but, as we say here, the North wind and cold air can really cut you in two.
To start headband with ear covers to fit over a baseball cap
Row 1: Ch 10. sc in 2nd ch from hook and in each remaining st, ch 1, turn. (9 sts).
Row 2: s c in BACK LOOP of each s c, ch 1, turn. (9 sts)
Repeat Row 2 - Row 6: until your work measures 2 inches.
SHAPE FIRST EARFLAP of the Headband:
SHAPE FIRST EARFLAP of the Headband:
Row 7: Work 3sc into the first st, work to end of row, ch 1, TURN (11 sts)
Row 8: sc in each st to 2nd last st, last st, 3sc in last st, ch 1, TURN. (13sts)
Row 9: Work 3sc into the first st, work to end of row, ch 1, TURN (15sts)
Row 10: sc in each st to last, 2sc into last st. (16)
Row 11: sc in each stitch, ch1, TURN (16sts)
Row 12: sc in each st to last, 2sc into last st.(17sts)
Row 13: 2sc in first stitch, ch1, TURN (18sts)
Row 14 to Row 21 : sc in first stitch, ch1, TURN (18sts) (ensure the earflap side is at the beginning of this row)
Row 22: 2sctog, sc to last st, Ch1 TURN (17 sts)
Row 23: sc in each st, Ch1, TURN
Row 24: 2sctog, sc to last st, Ch1 TURN (16sts)
Row 25: sc in each st, Ch1, TURN
Row 26: 2sctog, sc to last st, Ch1 TURN (15sts)
Row 27: sc in each st, Ch1, TURN
Row 28: 2sctog, sc to last st, Ch1 TURN (14 sts)
Row 29: sc in each st, Ch1, TURN
Row 30 : 2sctog, sc to last st, Ch1 TURN (13 sts)
Place marker in work.
Row 31 to Row 40: sc in each st, Ch1 TURN (13) (work measures approx 4.5 inches from the marker you placed previously)
SHAPE SECOND EARFLAP:
(ensuring you are at the same shaped edge as the previous earflap)
Row 41: 2sc in first st , sc in each stitch (14 sts)
Row 42: sc in each stitch
Row 43: 2Sc in first, sc in each stitch (15sts)
Row 44: sc in each stitch
Row 45: 2Sc in first, sc in each stitch (16sts)
Row 46: sc in each stitch
Row 47: 2Sc in first, sc in each stitch (17sts)
Row 48: sc in each st until last st, work 2st (18 sts)
Row 49 -55: sc in each st (18 sts)
Row 56: 2sctog in first stitch, ch1, TURN (17sts)
Row 57: sc in each stitch, ch1, TURN (17sts)
Row 58: sc in each st to last, 2sctog into last st.(16sts)
Row 59: sc in each stitch, ch1, TURN (16sts)
Row 60: sc in each st to last, 2sctog into last st. (15)
Row 61: Work 3sctog into the first st, work to end of row, ch 1, TURN (13sts)
Row 62: sc in each st to 2nd last st, last st, 3sctog in last st, ch 1, TURN. (11sts)
Row 63: Work 3sctog into the first st, work to end of row, ch 1, TURN (9sts)
Row 64: sc in each st,ch1 TURN (9 sts)
Row 65 - Row 70: sc in each st,ch1 TURN (9 sts)
Fasten off. Sew seams together. and finish off
Please Note:
Originally I meant for the Wider side to be at the front, however, my husband tried it both ways and felt the thinner piece sat better over the hat peak.
So when you are sewing up the sides together remember to work through BACK loops and you sew together.
This pattern was originally published in 2015 on another site (squiddo)
Why not try the Easy Cross Over Headband Pattern
The front cross headband ear warmers are the BEST seller for me at craft fairs, and my daughter lives in her crocheted headbands I make her,
She chooses the color and I make. These are all her favorites and most ORDERED by Customers.
The Earwarmers make great stocking stuffers and gifts for work colleagues for secret Santa Crochet gift.
See More of My Crochet headband Patterns HERE
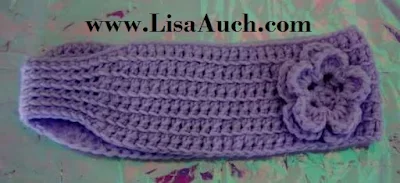
Baby Crochet Stretchy Headband - FREE Crochet PatternCrossover Crochet Headband FREE PatternEASY Crochet Headband with Crochet Flower - FREE PATTERN |
TWIST FRONT Crochet Headband
.jpeg) |
Stretchy Headband FREE Crochet Pattern |
Thank you for visiting my website or purchasing a pattern. It helps me to maintain the website and buy new materials to make even more FREE PATTERNS. As always you are free to make and sell items you have made from the pattern. You MUST acknowledge LisaAuch.com as the original designer. YOU will NOT copy or distribute the pattern online TEXT OR PDF, in part or whole anywhere else,or by creating an online video of my pattern. Without my express written permission. You can share a picture of the finished item. With a link BACK to a Page with my website on it You must NOT use my pictures in any way to sell a finished product. You must use your own. You will NOT copy or duplicate this PATTERN (whole or in part) onto ANY other SITE online. Without my express written permission. You will not crop or heavily EDIT the images belonging to LisaAuch Crochet/ Lisaauch.com, nor add any further TEXT or Imaging to them.This pattern may contain affiliate links. Where I may make a small commission from your purchase at no extra cost to you
Happy Hooking (c) All Rights Reserved LisaAuch.com
Happy Hooking (c) All Rights Reserved LisaAuch.com


