Crochet Chick FREE pattern, crochet a delightful little Chick for Easter. This is a pretty easy crochet duck amigurumi pattern, worked in rounds.
 |
| Easy crochet duck FREE pattern |
I just love Easter time, lots of chocolate, but I feel sometimes the kids get so much sweet stuff it's nice to give them a little cuddly Easter-themed crochet duck softie plush toy.
I have several FREE Easter Themed crochet patterns, and a smaller version of a crocheted duck made all in one piece, my grandson loved these little ducks.
 |
| Free Crochet pattern - Small Crochet Duck |
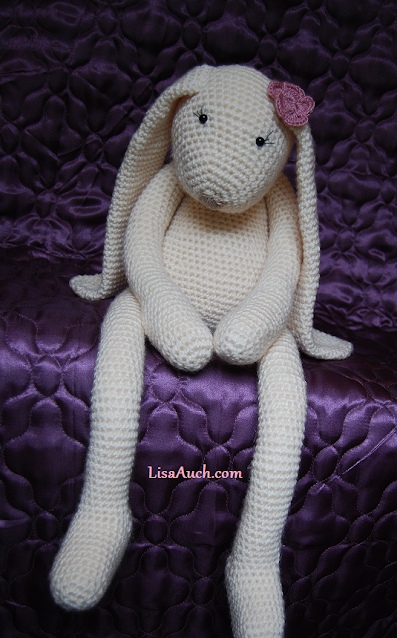
or how about the Little Crochet Rabbit that you make from a Square. Super a simple easy and fast Crochet Project. If you haven't seen how to do this then I recommend popping over to see how EASY this little rabbit is.
 |
| How to Crochet a Bunny FREE Pattern |
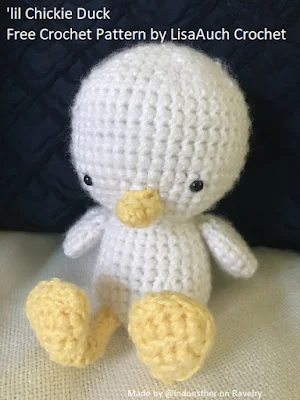
Anyway had great fun designing this 'Lil Crochet Chickie', especially his little legs and feet.
I was really happy with myself when I finally worked out and created a one-piece amigurumi leg and foot,(tricky when trying to have the flat foot and then the stuffed-shaped leg all worked in one piece! )
Even if I may say so myself, they have turned out awesome, with some pretty darn clever manipulation of basic stitches using the slip stitch, back loops, and single crochet.
To crochet the Chick You will need
a 4.00 mm hook2 x 50g yellow DK yarn (we will be working with 2 strands held together) or you can choose to work with a chunky yellow.
Black thread for eyes to embroider on or
If you want you can use safety eyes * (affix evenly apart at Rnd 7)
A small amount of orange yarn for Chicks beak, legs, and feet
Needle to join pieces together.
Chick head and body are made as 1 piece, wings,
If you want you can use safety eyes * (affix evenly apart at Rnd 7)
A small amount of orange yarn for Chicks beak, legs, and feet
Needle to join pieces together.
Chick head and body are made as 1 piece, wings,
legs beak are all separate pieces, and sewn to the main piece.
It is useful to use a stitch marker, moving up after every round is completed,
especially when working the chick's feet and legs.
NOTE: I LOVE this version below that was posted by @indoesther on Ravelry who Flipped the head and body parts of the chick and created this lil dude
The crochet chick Pattern Starts HERE
 |
| It is best to Position Your Crocheted chick Pieces Before Sewing for accurate placement. |
Sl st = Slip stitch
Hdc= Half Double Crochet
Dc = Double Crochet
Sc = Single crochet
Head :
Working With 2 strands of yellow together
Rnd 1: ch 2, 6 sc in 2nd ch from hook (6 sc)
Rnd 2: 2 sc in each st around. (12 sc)
Rnd 3: *Sc in next st, 2 sc in next st* repeat ** around. (18)
Rnd 4: *Sc in each of next 2 sts, 2 sc in next st* repeat **around. (24)
Rnd 5: *Sc in each of next 3 sts, 2 sc in next st* repeat ** around. (30)
Rnd 6: Sc in each st around. (30)
Rnd 7: *Sc in next 4 sts, 2 sc in next st* repeat ** around. (36)
Rnd 8: Sc in each st around. (36)
Rnd 9: Sc in each st around. (36)
Rnd 10: *Sc in next 4 sts, sc next 2 sts tog* repeat **around. (30)
Rnd 11: Sc in each st around. (30)
Rnd 12: Sc in each st around. (30)
Rnd 13: Sc in each st around (30)
Rnd 14: *Sc next 2 sts tog* repeat **around (15)
Rnd 15: Sc in each st around.
Stuff and shape head
Body
Rnd 16: 2 sc in each st around (30)
Rnd 17: *Sc in next 4 sts, 2 sc in next st* repeat **around (36)
Rnd 18: Sc in each st around
Rnd 19: *Sc in next 5 sts, 2 sc in next st* repeat **around (42)
Rnd 20-28: Sc in each st around
Rnd 29: *Sc in next 5 sts, sc next 2 sts tog* repeat **around (36)
Rnd 30: *Sc in next 4 sts, sc next 2 sts tog* repeat **around (30)
Rnd 31: *Sc in next 3 sts, sc next 2 sts tog* repeat **around (24)
Rnd 32: *Sc next 2 sts tog* repeat **around, join with sl st in first sc, fasten off (12)
Sew opening closed.
With black, using Blank embroidery thread or yarn, stitch eyes evenly apart between Rnd 7 /Rnd 8
How to Crochet Chicks Wing: (Make 2)
With yellow 2 strands together
Rnd 1: ch 2, 6 sc in 2nd ch from hook (6 sc)
Rnd 2: 2 sc in each st around (12 sc)
Rnd 3: Sc in each st around
Rnd 4: *Sc in next st, 2 sc in next st * repeat **around(18)
Rnd 5-7: Sc in each st around
Rnd 8: *Sc in next st, sc next 2 sts tog* repeat **around, join with Sl st in first sc, fasten off. (12)
Flatten last round and position at rnds 18-23 on each side of the body. Sew neatly to join pieces to body securely.
Beak (Make 1)
With Orange
Worked as 1 piece. Working both sides of the chain.
Ch 6, slip st into 2nd chain from hook, sc in next, 2dc in next, sc in next, sl stitch in last chain, Ch1.
Work along the opposite side of the chain,
slip stitch, sc in next, 2dc in next, sc in next, slip stitch, ch1, slip into first slip stitch worked. Fasten off and weave ends in neatly.
Fold over the beak and sew to head in position.
Legs (Make 2)
Rnd 1: Ch 7, sc in 2nd ch from hook, sc in next 4 sts, 3sc in last ch, working along back of chain sts, sc in next 4, 2sc in the last ch, do NOT join, place stitch marker. (14)
Rnd 2: sc in each st around
Rnd 3: sc in each st around
Rnd 4: sc in each st around
Rnd 5: 2sc together, sc 5, 2sc together. (12)
Rnd 6: 2sc together, sc 4, 2sc together. (10)
Rnd 7: slip st 5, sc 5 sts,(10)
Rnd 8: slip st 5, sc 5 sts, (10)
Rnd 9: slip st in front loops, sc 5 sts (10)
Rnd 10: slip st in front loops, hdc in back loops of next 5 sts (10)
Rnd 11-19: sc around, (10)
Fasten off and leave a long tail for attaching to the body.
Sew all pieces securely and weave in all ends neatly.
Or how about making a little
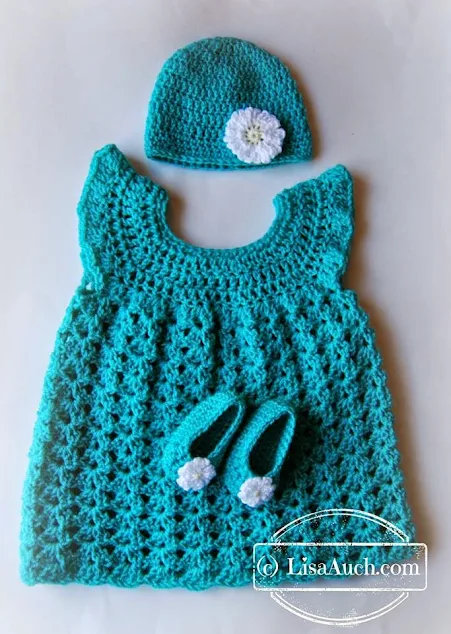
Crochet Baby Outfit perfect for Baby this Easter
I love creating little crochet Toys and things for the kids at easter why not try some of these easy Bunny Free Crochet Patterns Perfect for giving to kids as well
 |
| Free Crochet Bunny Pattern |
And my personal Favourite is the Crochet Bunny Basket Treat Bag.
 |
| Easter Basket Ideas to Crochet |
Thank you for visiting my website or purchasing a pattern.
It helps me to maintain the website and buy new materials to make even more FREE PATTERNS.
As always you are free to make and sell items you have made from the pattern.
But you must acknowledge LisaAuch.com as the original designer.
YOU will NOT copy or distribute the pattern online TEXT OR PDF, in part or whole anywhere else,
or by creating an online video of my pattern.
Without my express written permission.
You can share a picture of the finished item. With a link BACK to a Page with my website on it
You must NOT use my pictures in any way to sell a finished product.
You must use your own.
You will NOT copy or duplicate this PATTERN (whole or in part) on to ANY other SITE online. Without my express written permission.
This pattern may contain affiliate links.
Where I may make a small commission from your purchase at no extra cost to you
Happy Hooking (c) All Rights Reserved LisaAuch.com


